


📢 转载信息
原文作者:Ryan Vanderwerf, Kunle Adeleke, Lu Min, and Tim Westman
2024 年 10 月 10 日,亚马逊宣布将于 2025 年 10 月 31 日停用 Amazon Lookout for Vision 服务(请参阅“探索替代方案并无缝迁移 Amazon Lookout for Vision 数据”博客文章)。作为对客户的过渡指导的一部分,我们建议对有兴趣使用人工智能/机器学习计算机视觉模型进行自动化质量检测的客户,使用 Amazon SageMaker AI 工具来构建应用程序。为支持此工作,AWS 在 AWS Marketplace 上提供了一个预训练的计算机视觉缺陷检测模型,该模型可以使用 Amazon SageMaker AI 根据客户的具体用例进行微调。如果在云中运行,此模型仅需支付训练或推理的基础设施成本。这种方法提供了加速解决方案开发所需的工具,同时还能完全灵活地构建与任何现有硬件和软件基础设施集成的解决方案。
在这篇博客文章中,您将通过遵循我们的分步指南,了解如何将计算机视觉工作负载从 Amazon Lookout for Vision 迁移到 Amazon SageMaker AI。
AWS 将用于该服务的主要底层模型共享给 AWS Marketplace 上的最终用户。当您在自己的 AWS 账户中进行训练以在 AWS 或边缘进行部署时,可以使用两种主要类型的模型:二元分类和语义分割。
此模型可帮助客户以自己的节奏继续使用 AWS 缺陷检测技术,并获得更大的灵活性。例如,您可以使用更大的实例类型来训练模型,以实现更快的训练时间。通过访问设置超参数,您还可以调整以前在 AWS 控制台中无法实现的模型行为。例如,您可以为语义分割设置多头模型以禁用二元分类头。这可以使模型模式对不断变化的光照和背景条件更具容忍性。您还可以个性化最大训练时间,而 Amazon Lookout for Vision (L4V) 上的最大训练时间被设置为不可更改的 24 小时限制。
Amazon Lookout for Vision 的 GitHub 存储库已更新了一个 Jupyter Notebook,可帮助您使用这两种模型类型训练数据集并将其打包。从那里,您可以使用 SageMaker 端点或边缘设备部署模型。
要标注除示例数据之外的图像,您可以使用 Amazon SageMaker Ground Truth 来启用众包或允许私有团队标注数据,或者使用像 Edge Impulse、Roboflow 或 SuperbAI 这样的合作伙伴解决方案来完成此操作。当您拥有带标签数据的清单文件时,就可以使用 Marketplace 模型进行训练了。您将丢失像 Amazon Lookout for Vision 控制台那样的基于缩略图的数据集管理工具,因此请考虑使用上述合作伙伴解决方案之一来帮助管理数据集。您也可以使用此指南从 Lookout For Vision 服务导出现有数据。
先决条件
在开始之前,请确保您具备以下组件和权限:
- Amazon SageMaker Studio 或 Amazon SageMaker 统一 Studio 用于集成开发环境 (IDE)
- 具有以下权限的 AWS 身份和访问管理 (IAM) 角色,以遵循最小权限原则
- Amazon S3
- s3:GetObject
- s3:PutObject
- s3:DeleteObject
- s3:ListBucket
- SageMaker
- sagemaker:CreateTrainingJob
- sagemaker:CreateModel
- sagemaker:CreateEndpoint
- sagemaker:CreateEndpointConfig
- sagemaker:CreateTransformJob
- sagemaker:DescribeTrainingJob
- sagemaker:DescribeModel
- sagemaker:DescribeEndpoint
- sagemaker:DescribeEndpointConfig
- sagemaker:DescribeTransformJob
- sagemaker:InvokeEndpoint
- sagemaker:DeleteEndpoint
- sagemaker:DeleteEndpointConfig
- sagemaker:DeleteModel
- Amazon S3
- 模型订阅:
- 一个已订阅 Computer Vision Defect Detection Model 的 AWS 账户,或者
- 一个具有以下三个权限的 IAM 角色,用于在您使用的 AWS 账户中进行 AWS Marketplace 订阅:
- aws-marketplace:ViewSubscriptions
- aws-marketplace:Unsubscribe
- aws-marketplace:Subscribe
- 带标签的数据(您可以使用 GitHub 上的 cookie 数据样本),或使用 SageMaker Ground Truth 或 AWS 合作伙伴工具标注您自己的数据
- 创建 SageMaker 笔记本实例和运行 Jupyter 笔记本的基本知识
架构概述
下图说明了从图像采集到边缘推理的端到端流程。本博客重点介绍步骤 2 和 3。

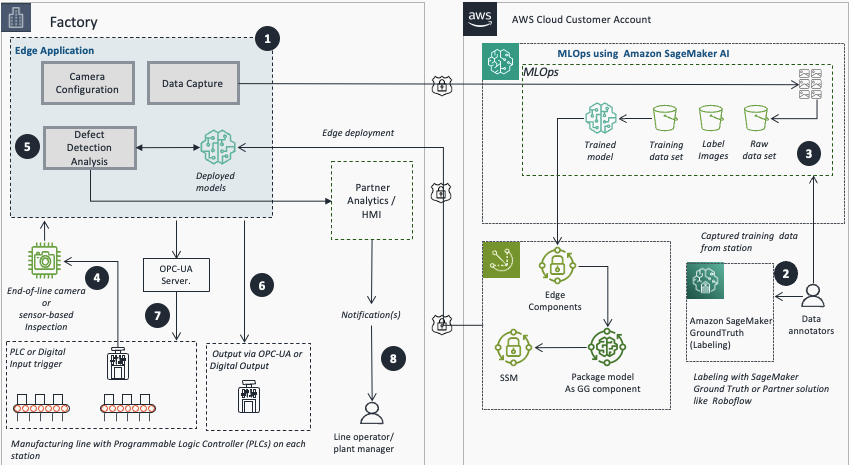
- 使用边缘应用程序配置摄像头或传感器并捕获训练图像。
- 使用 SageMaker GroundTruth 或 AWS 合作伙伴平台导出和标注图像。
- 使用 Amazon SageMaker AI 进行模型训练。
- 使用 REST、PLC 或数字输入进行图像采集和处理。
- 使用训练和部署的模型运行实时推理。
- 将推理结果发布到分析和监控,以获取警报和分析。
- 对相关机器执行自动化操作,或使用 OPC-UA 或数字输出来通知工厂人员检查站组件的异常情况。
- 生产线操作员和工厂经理接收操作通知。
设置标注流程
本节介绍使用 Amazon SageMaker Ground Truth 设置标注流程的步骤,包括创建私有标注团队和配置标注作业。
- 配置 Amazon SageMaker Ground Truth 私有团队:
- 选择 Amazon SageMaker AI、Ground Truth、标注工作团队。
- 选择 Private,然后选择 Create Private Team。
- 输入团队名称。
- 将其他值保留为默认值。
- 选择 Create a new Amazon Cognito user group。
- 选择 Create private Team。
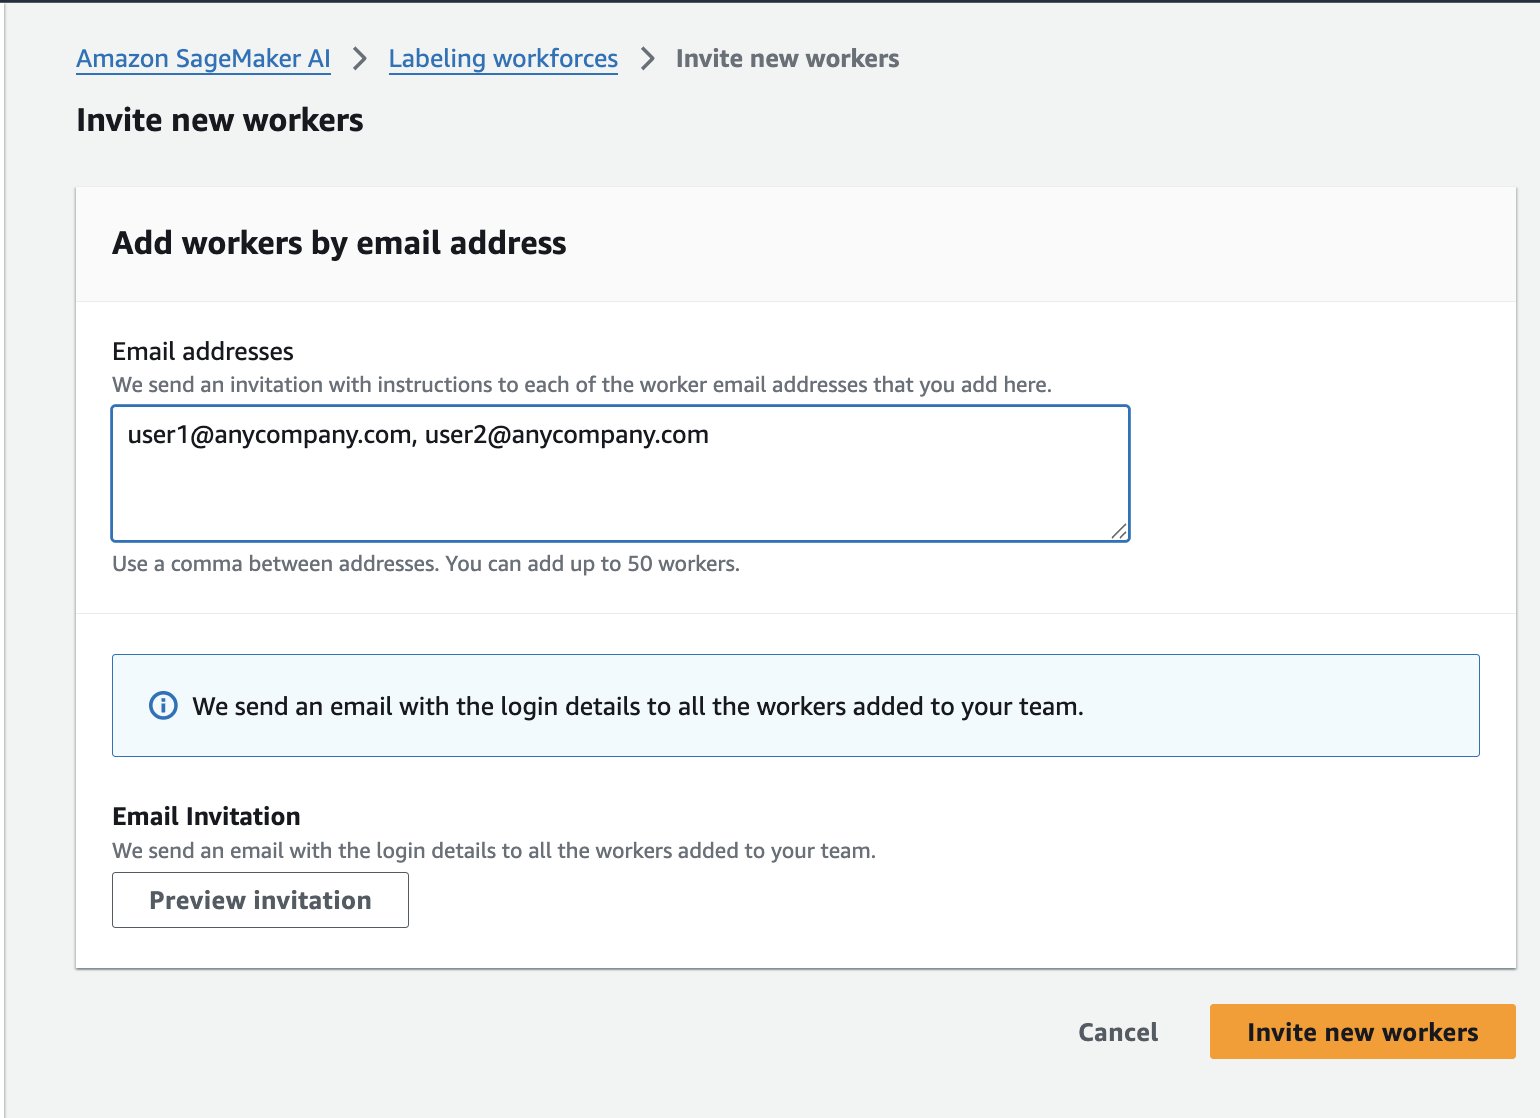
- 在 Workers 选项卡上,选择 Invite New Workers。
- 输入团队成员的电子邮件地址以发送注册邀请。
标注数据集
成功完成标注工作流程设置后,下一步是标注数据集。本节介绍如何通过将图像上传到 Amazon Simple Storage Service (Amazon S3) 存储桶来准备数据集,然后创建并运行 SageMaker Ground Truth 标注作业,将图像标注为 normal(正常)或 anomaly(异常)。
- 将图像数据集上传到 SageMaker Ground Truth 可以访问的 Amazon S3 存储桶中。如果您没有数据集,可以使用 cookie-dataset 或 aliens-dataset。
- 将“normal”和“anomaly”文件夹中的所有图像复制到单个目录中供 SMGT 访问,否则您将在下一步中收到错误消息。
- 要使用 AWS CloudShell,请运行以下脚本:
#!/bin/bash # Clone the repository git clone https://github.com/aws-samples/amazon-lookout-for-vision.git cd amazon-lookout-for-vision/aliens-dataset # Remove existing all directory if it exists rm -rf all # Create a new all directory mkdir -p all # Copy normal images to all directory cp normal/*.png all/ # Make sure we're in the right directory before running the loop cd "$(dirname "$0")/amazon-lookout-for-vision/aliens-dataset" # Copy anomaly images with .anomaly.png suffix for file in anomaly/*.png; do if [ -f "$file" ]; then filename=$(basename "$file") cp "$file" "all/${filename}.anomaly.png" fi done # Count files to verify echo "Normal images: $(find normal -name "*.png" | wc -l)" echo "Anomaly images: $(find anomaly -name "*.png" | wc -l)" echo "Total images in all directory: $(find all -type f | wc -l)" # Upload to S3 aws s3 cp all/ s3://<BUCKET_NAME>/aliens-dataset-all/ --recursive # Clean up - remove the cloned repository cd ../.. rm -rf amazon-lookout-for-vision - 或者,如果您安装了 AWS CLI,可以使用以下命令复制它们(请参阅设置 AWS CLI 以了解如何执行此操作):
sh-4.2$ git checkout https://github.com/aws-samples/amazon-lookout-for-vision.git sh-4.2$ cd aliens-dataset ## keep in mind the filenames here clash, the following Linux command can help fix this sh-4.2$ mkdir all sh-4.2$ cp normal/*.png all sh-4.2$ aws s3 cp s3://aws-blogs-artifacts-public/artifacts/ML-19308/copy_conflicts.sh . sh-4.2$ bash copy_conflicts.sh sh-4.2$ ls -al all/ -rwxrwxr-x 1 ec2-user ec2-user 120035 Feb 17 16:39 59.png -rwxrwxr-x 1 ec2-user ec2-user 93407 Feb 17 16:39 5.png -rwxrwxr-x 1 ec2-user ec2-user 125477 Feb 17 16:39 5.png.anomaly.png -rwxrwxr-x 1 ec2-user ec2-user 123679 Feb 17 16:39 60.png -rwxrwxr-x 1 ec2-user ec2-user 96330 Feb 17 16:39 6.png -rwxrwxr-x 1 ec2-user ec2-user 126014 Feb 17 16:39 6.png.anomaly.png -rwxrwxr-x 1 ec2-user ec2-user 81051 Feb 17 16:39 7.png -rwxrwxr-x 1 ec2-user ec2-user 128985 Feb 17 16:39 7.png.anomaly.png -rwxrwxr-x 1 ec2-user ec2-user 94216 Feb 17 16:39 8.png -rwxrwxr-x 1 ec2-user ec2-user 128002 Feb 17 16:39 8.png.anomaly.png -rwxrwxr-x 1 ec2-user ec2-user 110814 Feb 17 16:39 9.png -rwxrwxr-x 1 ec2-user ec2-user 131385 Feb 17 16:39 9.png.anomaly.png sh-4.2$aws s3 cp all/ s3://<BUCKET_NAME>/aliens-dataset-all/ --recursive注意:为避免两个文件夹中的文件名冲突,添加了
.anomaly后缀。上传的文件应位于您的<BUCKET_NAME>/aliens-dataset-all存储桶中,供 Ground Truth 作业使用。
- 在 AWS 控制台中,导航到 Amazon SageMaker AI、Ground Truth、标注作业 (Labeling Jobs)、创建标注作业 (Create labeling job)。

- 此处有多个选项需要填写;需要填写或选择的最重要字段是:
- 输入数据设置:选择 Automated data setup
- 用于输入数据集的 S3 位置:<您的数据集所在的完整路径>
- 用于输出数据集的 S3 位置:<与输入数据集相同的位置>
- 数据类型:选择 Image
- IAM 角色 – 如果您还没有设置允许 Ground Truth 与 SageMaker 服务交互的角色,请选择 Create new role。
- 选择 Complete data setup。将显示“输入数据连接成功”消息。如果出现错误,请检查您的 IAM 角色,确保启用了 S3 访问,并且该目录中包含图像文件,因为它不会递归遍历子目录。

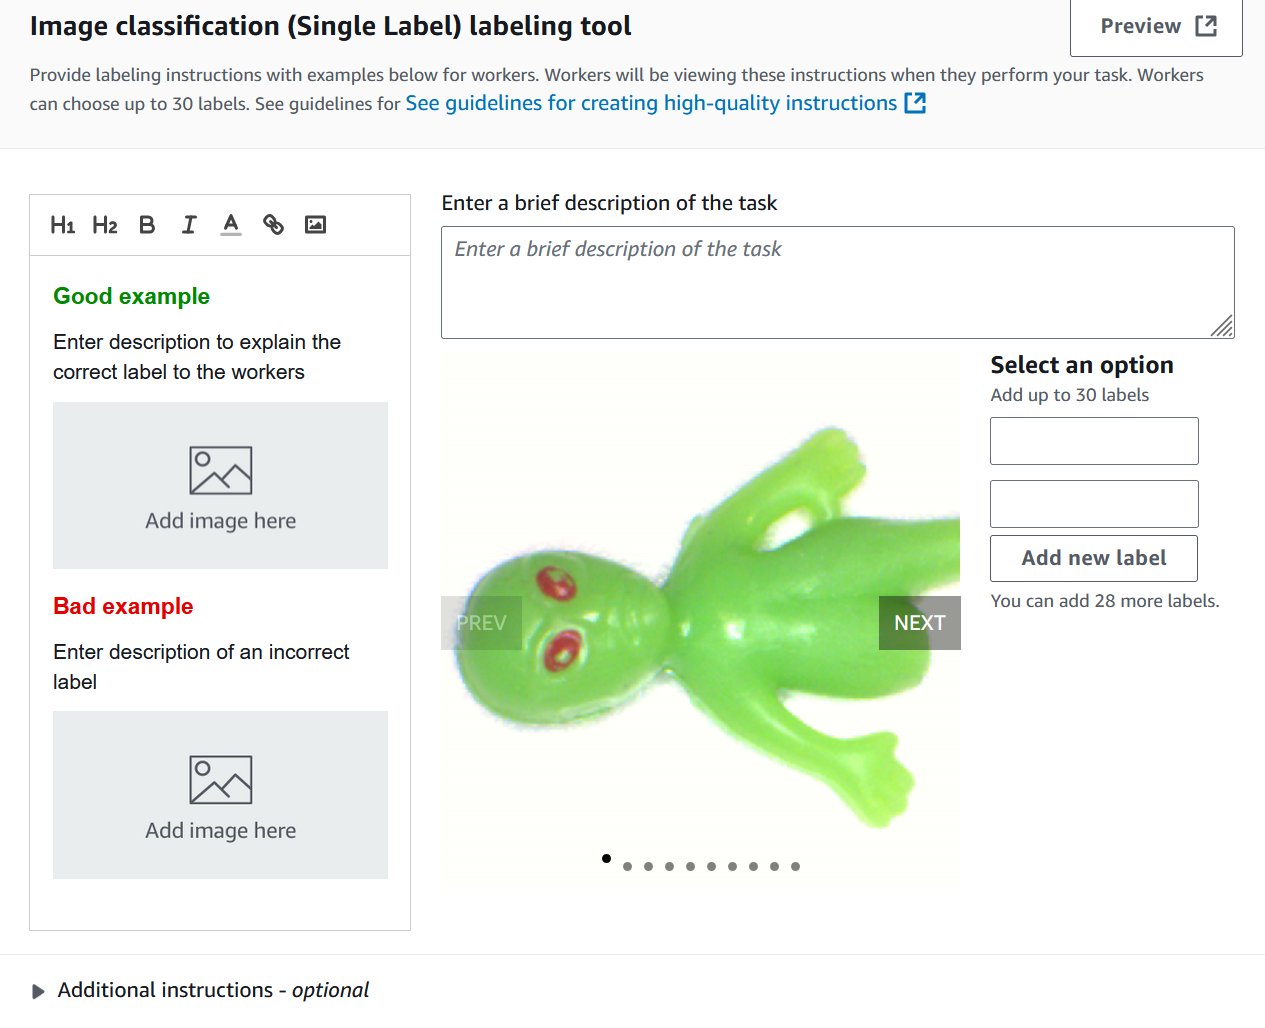
- 选择任务类型。这些模型支持 Image Classification (Single Label)(图像分类(单标签)),即二元分类(例如好或坏),或 Semantic segmentation(语义分割)。您不能将边界框类型与这些模型一起使用。您稍后可以更改选择。
- 选择 Next。
- 对于 Worker types,选择 Private。您可以在开发者指南中阅读有关 Amazon Mechanical Turks 或标注订阅的更多信息。
- 在 Private teams 下,选择您在上一步中创建的私有团队。
- 对于 Task timeout 和 Task expiration time,保留默认值。
- 取消选择 Enable automated data labeling。您可以在此处阅读有关自动化数据标注的更多信息;但是,它与语义分割不兼容。
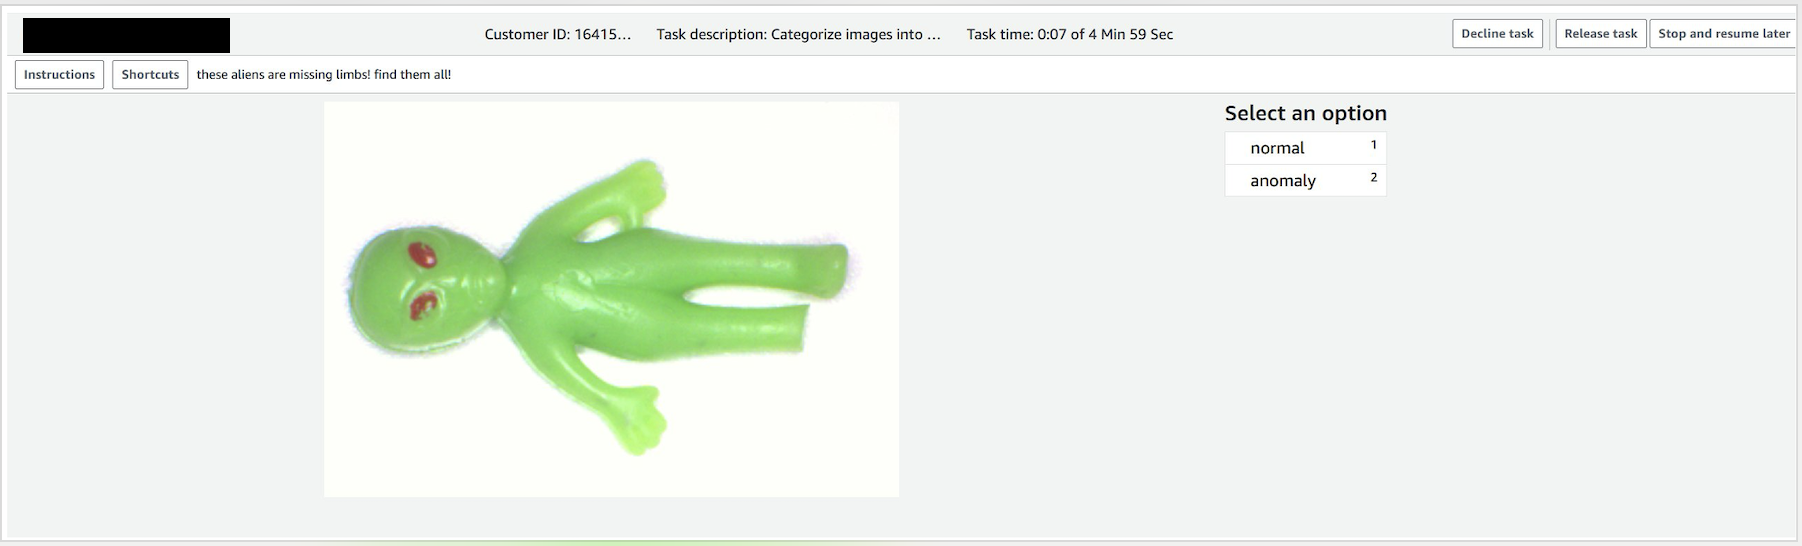
- 在 Image classification 屏幕上,添加两个新标签:normal 和 anomaly。您可以根据需要填写其余信息。选择 Preview 查看对最终用户而言的显示效果。
- 选择 Create。
- 选择 Ground Truth,然后选择 Private 选项卡。
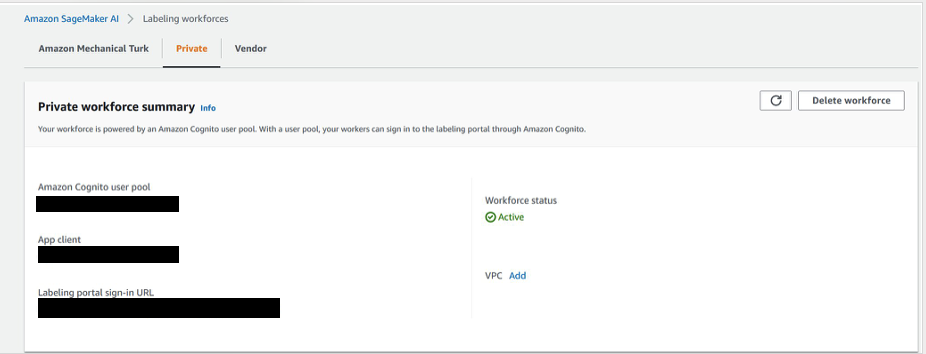
- 在新标签页中打开标注门户登录 URL,然后登录以查看分配给您的任务。
- 选择分配的任务,然后选择 Start working 来标注数据。
- 选择 normal 或 anomaly。
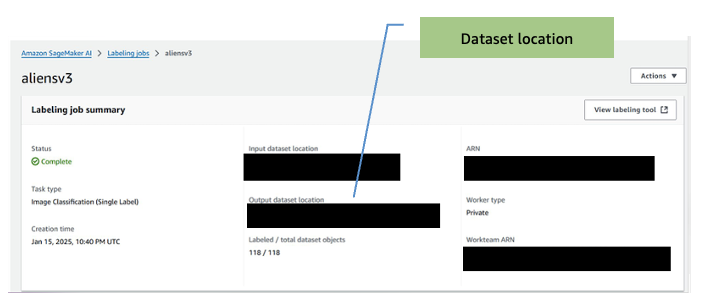
- 作业完成后,记下 output dataset location(输出数据集位置)。训练步骤将需要此信息。
- 如果您需要向标注作业添加工作者:
- 在 Amazon SageMaker AI Ground Truth 页面上,选择 Labeling workforces。
- 选择 Private 选项卡。
- 单击先前创建的私有团队 (CV-team)。
- 选择 Workers 选项卡
- 从列表中选择所需的工作者,然后选择 Add workers to team。
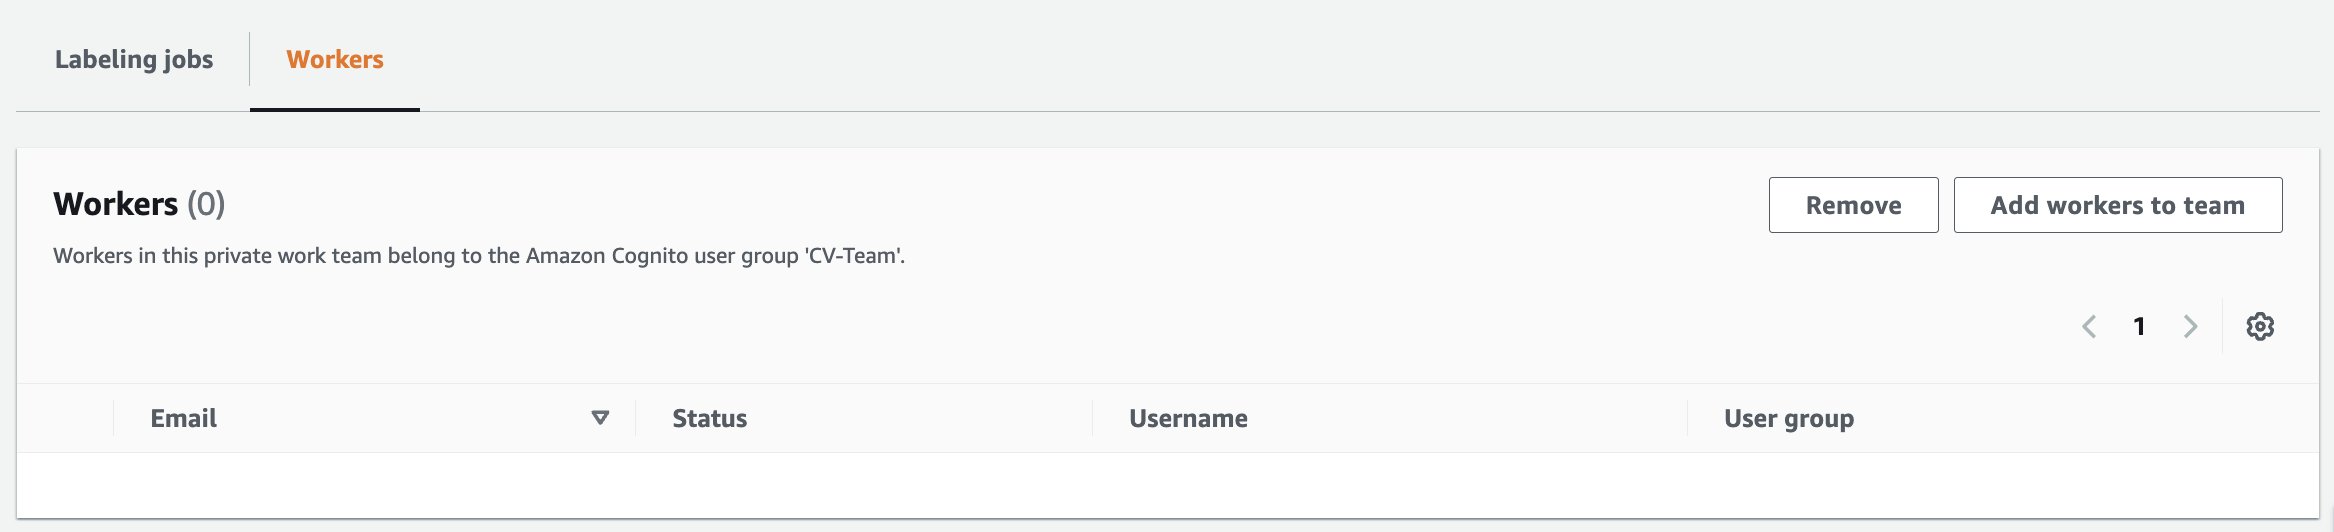
-
- 然后您将被重定向到 Amazon SageMaker AI,标注工作团队页面,并显示工作者已添加的确认消息。

完成标注任务后,任务的输出将用于训练 AWS Marketplace 中的计算机视觉检测模型。
训练模型
本节讨论使用 AWS Marketplace 计算机视觉检测模型和上一步的带标签数据集来训练计算机视觉模型。
- 前往 AWS Marketplace 订阅模型,网址为 https://aws.amazon.com/marketplace/pp/prodview-j72hhmlt6avp6。
- 选择 Continue to Subscribe。
- 选择 Continue to configuration。
- 选择最新的软件版本、您的区域,并确保选中了 Create a training job。
注意: 复制 Product Arn 并将其保存在文本编辑器或记事本中以供稍后使用。
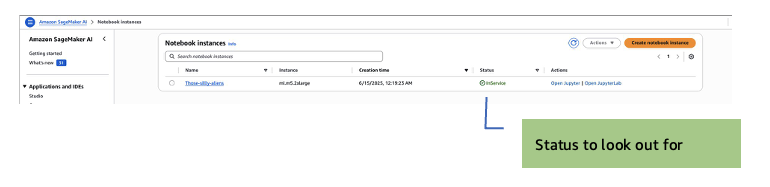
- 转到 SageMaker AI、Notebook instances、Create notebook instance。
注意:不需要启用 GPU 的笔记本实例。Amazon SageMaker 训练作业将在训练期间启动所需的 GPU 实例,因此大多数基本实例就足够了。
- 选择 m5.2xl instance、Jupyter lab 4,卷大小为 128 GB。默认值为 5 GB,太小了。
- 选择一个 IAM 角色以允许笔记本访问您账户中的资源。您将需要访问 S3。
- 在 Git Repositories – optional 部分,选择 Clone a public Git repository to this notebook instance only。
- 输入 Git 存储库 URL。将所有其他字段保留为默认值,然后选择 Create notebook instance 开始实例。
- 实例启动后(状态显示为 InService),为新的笔记本实例选择 Open JupyterLab 操作。
JupyterLab 打开时:
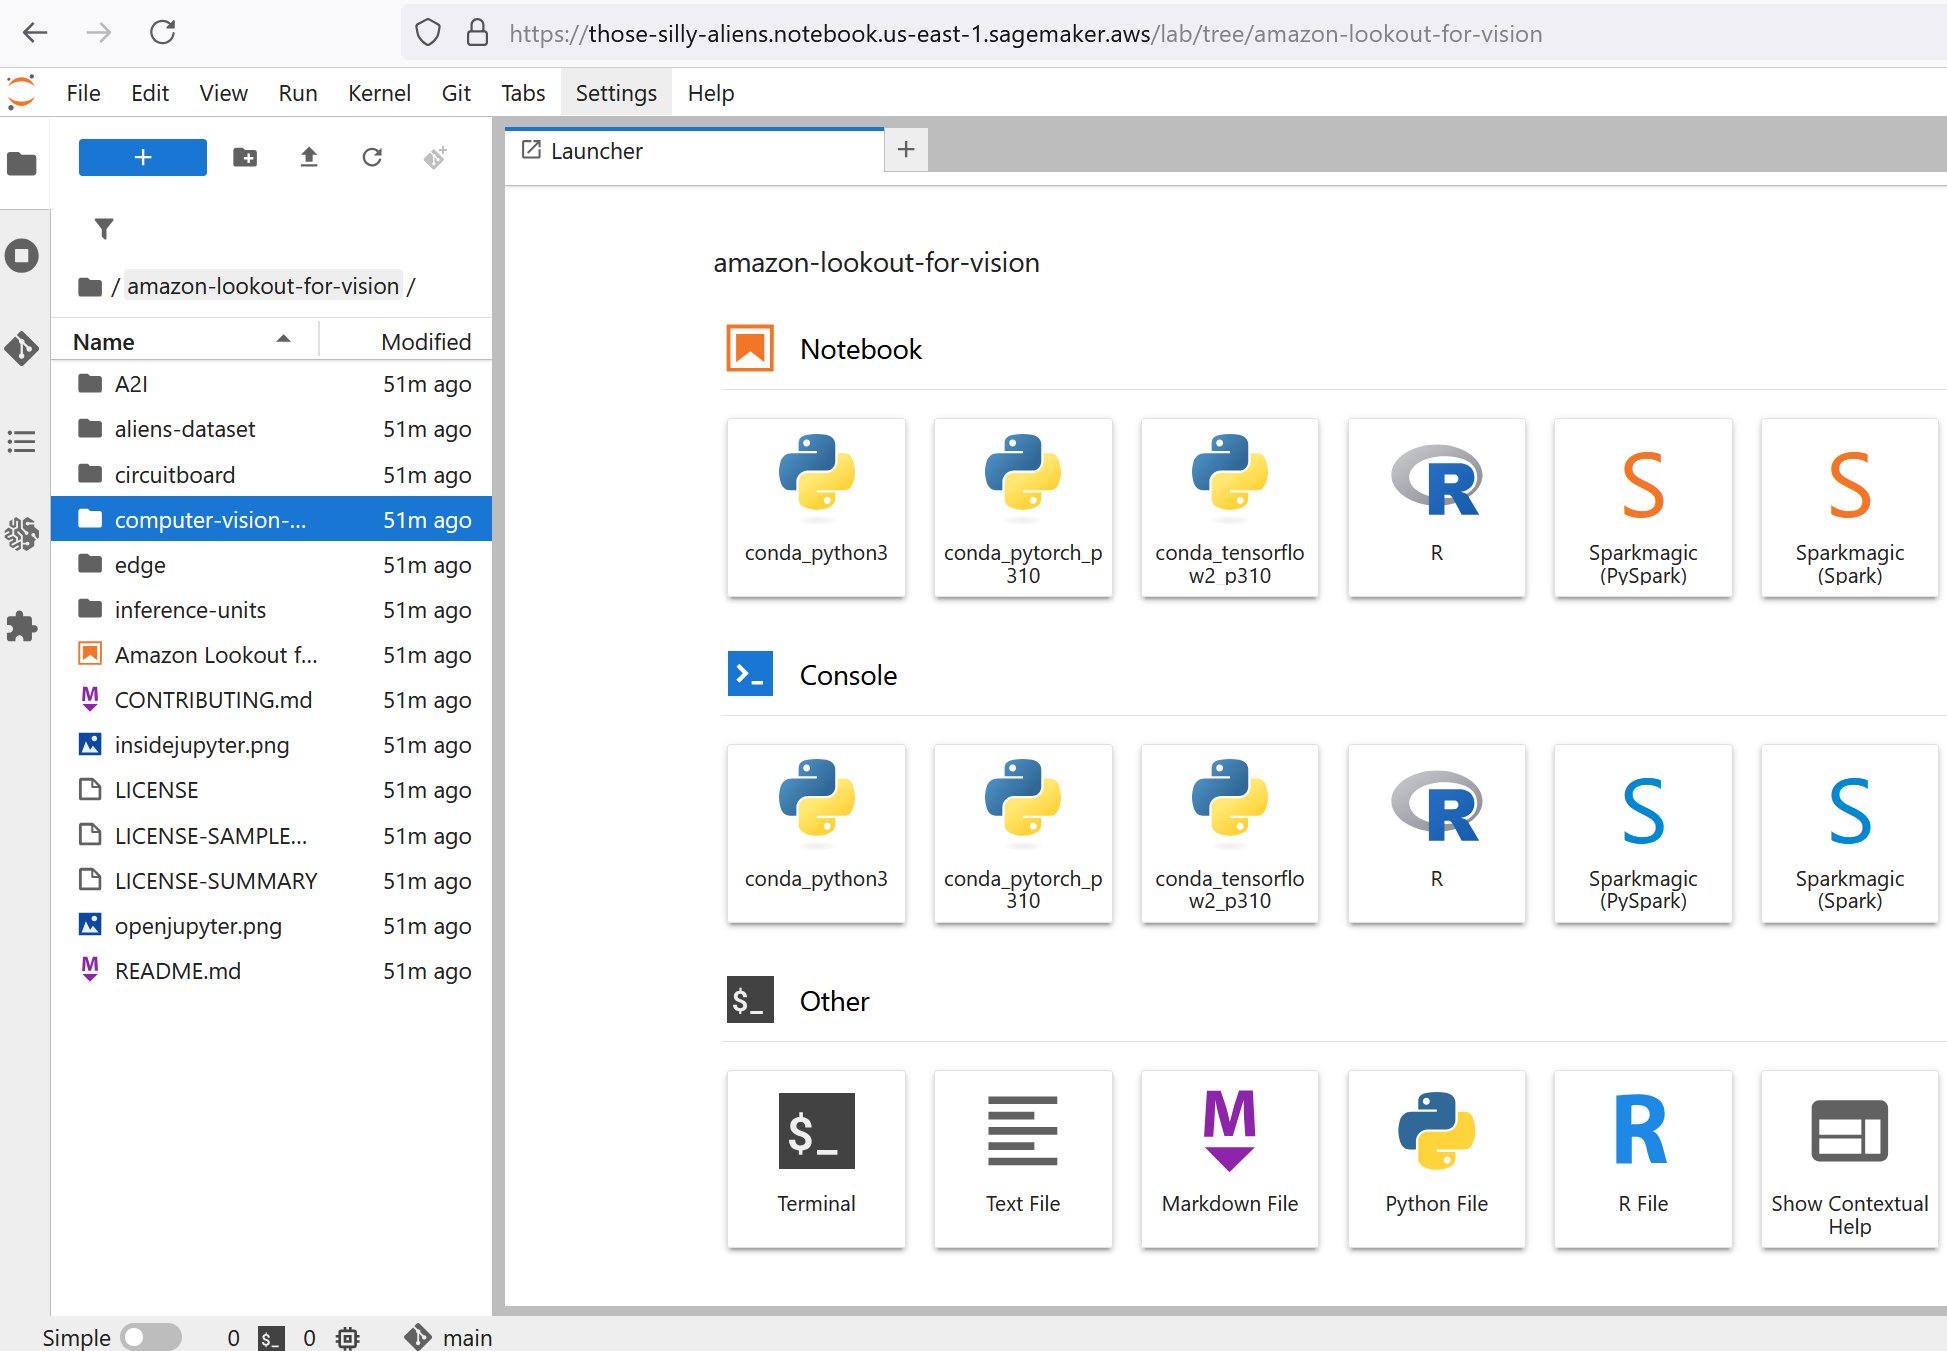
- 在左侧导航窗格中,打开 computer-vision-defect-detection 文件夹。
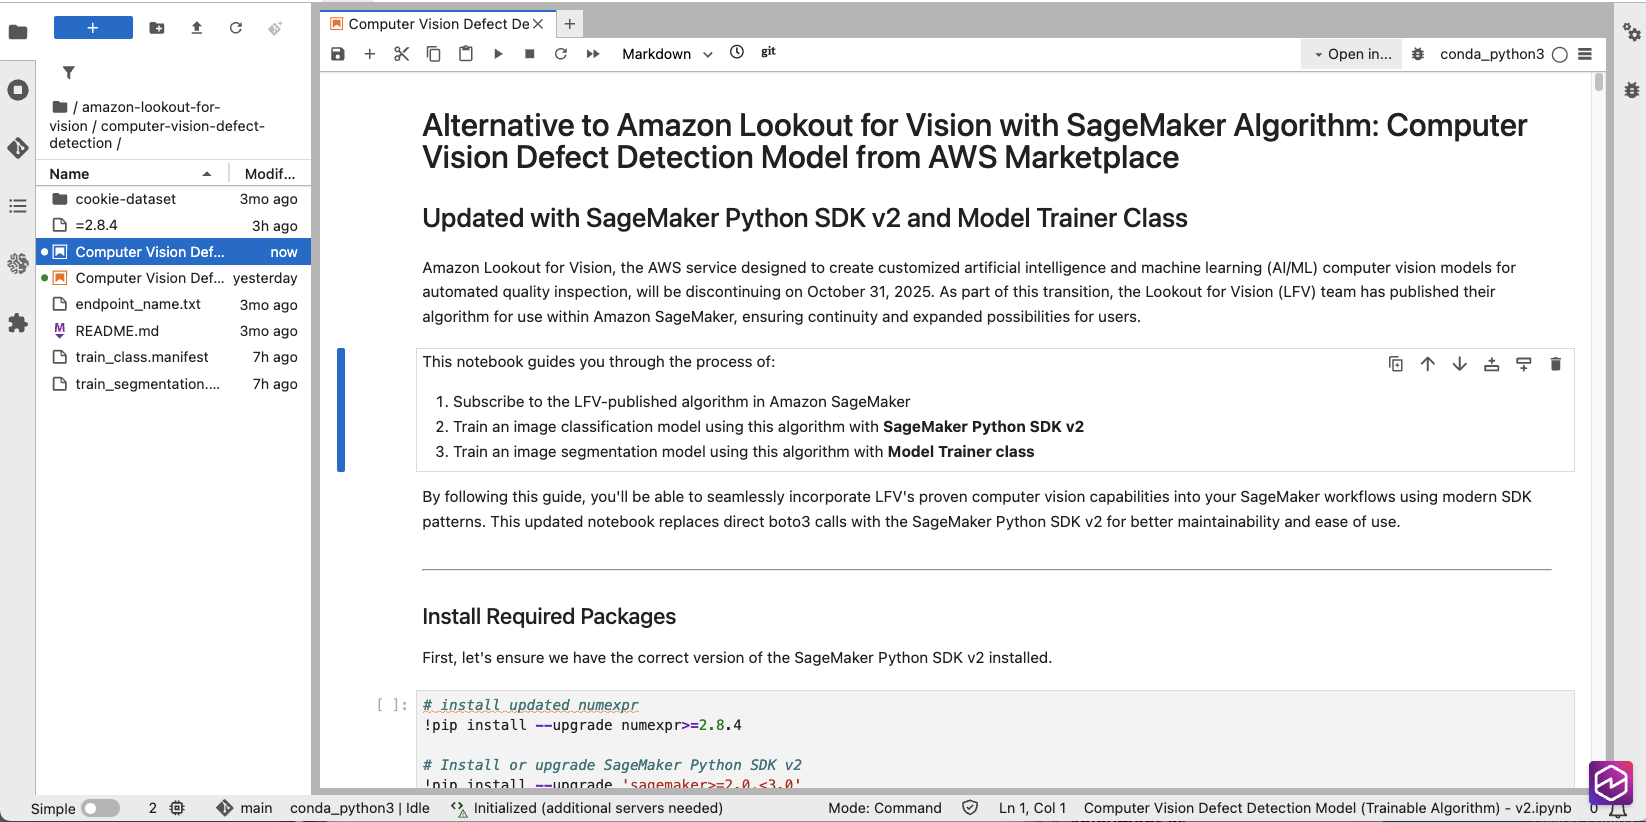
- 在 AWS 控制台中,转到 Marketplace、Manage subscriptions,然后复制您的模型订阅的 ARN。

- 在 Jupyter 笔记本中,找到以下代码片段,并使用您在上一步中复制的产品 Arn 更新 algorithm_name 变量的占位符值。
# TODO: change this to use subscribed SageMaker algorithm
algorithm_name = "<Customer to specify the algorithm name after subscription >"
此步骤将使用的存储桶将自动创建,并命名格式为 SageMaker-<REGION>-<ACCOUNT_ID>。
# Initialize SageMaker session and get execution role
sagemaker_session = sagemaker.Session()
region = sagemaker_session.boto_region_name
#bucket = sagemaker_session.default_bucket()
role = get_execution_role()
# Project name would be used as part of s3 output path
project = "ComputerVisionDefectDetection”- 在 AWS 控制台中,导航到 Amazon SageMaker AI、Ground Truth、标注作业,然后选择已完成的作业。
- 确定并记下输出图像文件夹(Output dataset location)。
注意:要开始训练作业,请查看 <BUCKET NAME>/aliens-dataset/all/aliensv2/manifests/output/output.manifest 中输出清单的路径——这将是下一步的训练清单。
- 将 bucket 变量设置为图像存储桶名称,并将对象键设置为清单的路径:
- bucket:存储清单文件的位置
- classification_manifest_key:输出清单文件存储的位置(例如,aliens-dataset-all/[job-name]/manifests/output/output.manifest)
- 在 Classification Model with Algorithm Estimator 部分中,查看模型训练配置。
# Create AlgorithmEstimator for classificatio
classification_estimator = AlgorithmEstimator(
algorithm_arn=algorithm_name,
role=role, instance_count=1,
instance_type='ml.g4dn.2xlarge',
volume_size=20, max_run=7200,
input_mode='Pipe', # REQUIRED: Algorithm only supports Pipe mode
sagemaker_session=sagemaker_session,
enable_network_isolation=True
) # Set hyperparameters
classification_estimator.set_hyperparameters(
ModelType='classification',
TestInputDataAttributeNames='source-ref,anomaly-label-metadata,anomaly-label',
TrainingInputDataAttributeNames='source-ref,anomaly-label-metadata,anomaly-label')
print("Classification estimator configured successfully")</code></pre><pre><code class="lang-python"># Define training input using TrainingInput class
classification_training_input = TrainingInput(
s3_data=classification_s3_path, '
s3_data_type='AugmentedManifestFile',
attribute_names=[
'source-ref',
'anomaly-label-metadata',
'anomaly-label'
],
record_wrapping='RecordIO',
input_mode='Pipe' # Must match the estimator's input_mode)
# Start training job
classification_job_name = f'defect-detection-classification-
{datetime.datetime.now().strftime("%Y-%m-%d-%H-%M-%S")}'
print(f"Starting classification training job: {classification_job_name}")
classification_estimator.fit(
inputs={'training': classification_training_input},
job_name=classification_job_name,
wait=True,
logs=True )
注意:该作业使用 NVIDIA G4DN 实例。它们可以升级到更大的实例以减少训练时间,但仅限于 118 个实例。图像数据集训练在 g4dn.2xl 上不到 10 分钟即可完成。您可以尝试其他实例类型,但结果可能会有所不同,因为模型是在 G4DN 实例上经过广泛测试的。
- 验证 Hyperparameters 部分中
TestInputDataAttributeNames和TrainingInputDataAttributeNames的值,以及 TrainingInput 部分中的AttributeNames。所有三个部分中的标签必须与清单文件的结构匹配。这是一个示例清单:{ "source-ref": "s3://[bucketname]/getting-started/training-images/anomaly-1.jpg", "anomaly-label-metadata": { "job-name": "anomaly-label", "class-name": "anomaly", "human-annotated": "yes", "creation-date": "2022-08-22T20:52:51.851Z", "type": "groundtruth/image-classification" }, "anomaly-label": 1 } { "source-ref": "s3://[bucketname]/getting-started/training-images/anomaly-2.jpg", "anomaly-label-metadata": { "job-name": "anomaly-label", "class-name": "anomaly", "human-annotated": "yes", "creation-date": "2022-08-22T21:11:39.545Z", "type": "groundtruth/image-classification" }, "anomaly-label": 1 }注意:三个值中有两个包含标注作业的名称。
response = sagemaker.create_training_job( TrainingJobName=classification_training_job_name, HyperParameters={ 'ModelType': 'classification', 'TestInputDataAttributeNames': 'source-ref,aliens-v3,aliens-v3-metadata', 'TrainingInputDataAttributeNames': 'source-ref,aliens-v3,aliens-v3-metadata' } )- 运行 Classification Model with Algorithm Estimator 部分中列出的所有单元格或块以启动训练作业。
- 如果还要训练分割模型,请遵循 Segmentation Model with Algorithm Estimator 部分中的步骤。
注意:训练完成后,您就可以对其进行测试了!有几种推理选项可供选择:
- 使用 Amazon SageMaker 端点的实时推理
- Amazon SageMaker AI 批量转换推理。
- 边缘部署
部署模型
Amazon SageMaker AI 端点和 Amazon SageMaker AI 批量转换推理都用于推理,但服务于不同的目的。
Amazon SageMaker AI 端点
Amazon SageMaker AI 端点用于实时推理,提供低延迟预测,适用于需要即时响应的应用程序。端点在部署期间保持活动状态,更适合连续和稳定的流量,但由于持续的资源使用而可能成本更高。
- 在 Jupyter 笔记本中,导航到 (Optional) Running real-time inference using Amazon SageMaker endpoints 部分。
- 运行以下单元格块以设置和调用端点:
#classification_training_job_name = "defect-detection-classification-2025-10-01-00-29-57" # remove classification_training_job_name = "<provide training job name here>" # Create estimator from training job estimator = AlgorithmEstimator.attach(classification_training_job_name) # Deploy endpoint using SageMaker v2 SDK predictor = estimator.deploy( initial_instance_count=1, instance_type='ml.c5.2xlarge' ) print(f"Endpoint deployed: {predictor.endpoint_name}") #Invoke the endpoint # Invoke the endpoint using predictor result = predictor.predict(image_data) # Clean up the temporary file os.remove(local_file) # Print the result print("\nEndpoint Response:") print(json.dumps(result, indent=2))- 验证推理结果,然后通过运行以下代码块删除端点:
# Delete the endpoint
predictor.delete_endpoint()
print("Endpoint deleted")
注意:如果您启动了端点,请记住,在关闭之前,您将一直被计费。
Amazon SageMaker AI 批量转换 (Batch Transform)
批量转换专为脱机推理和对存储在 S3 中的大型数据集进行预测而设计,非常适合... [内容被截断]
🚀 想要体验更好更全面的AI调用?
欢迎使用青云聚合API,约为官网价格的十分之一,支持300+全球最新模型,以及全球各种生图生视频模型,无需翻墙高速稳定,文档丰富,小白也可以简单操作。
评论区