


📢 转载信息
原文链接:https://machinelearningmastery.com/building-react-agents-with-langgraph-a-beginners-guide/
原文作者:Vinod Chugani
在本文中,您将学习 ReAct(推理+行动)模式的工作原理,以及如何使用 LangGraph 来实现它——首先使用一个简单的、硬编码的循环,然后是使用大型语言模型(LLM)驱动的代理。
我们将涵盖的主题包括:
- ReAct 周期(推理 → 行动 → 观察)及其对代理的实用性。
- 如何使用 LangGraph 将代理工作流建模为图。
- 构建一个硬编码的 ReAct 循环,然后将其升级为由 LLM 驱动的版本。
让我们来探索这些技术。
使用 LangGraph 构建 ReAct 代理:初学者指南
图片由作者提供
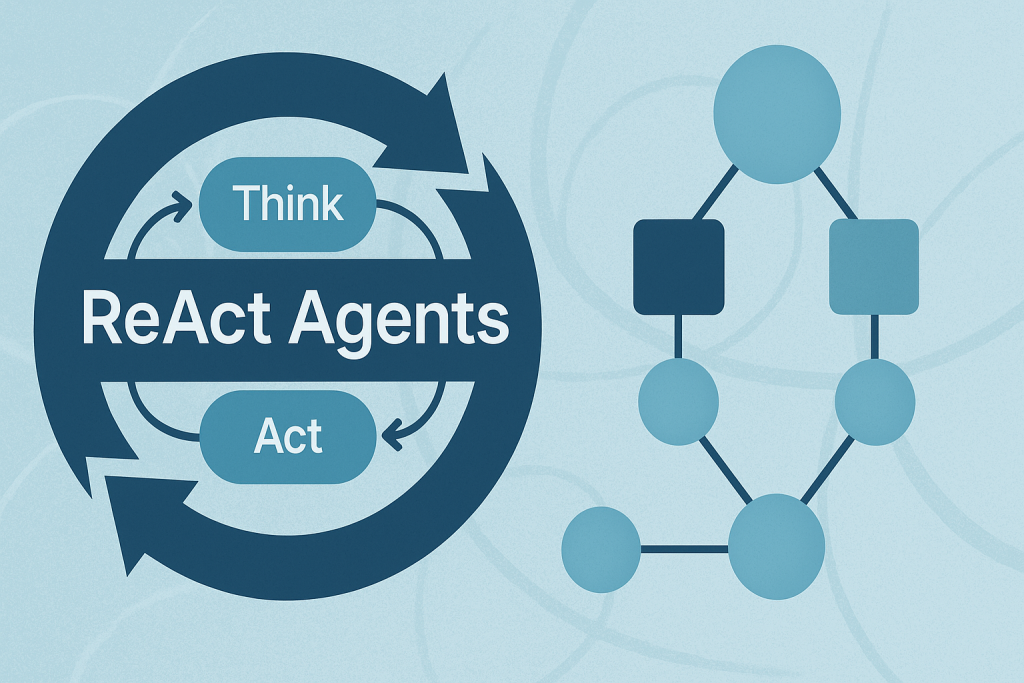
什么是 ReAct 模式?
ReAct(推理+行动)是一种构建 AI 代理的常见模式,这些代理能够思考问题并通过采取行动来解决它们。该模式遵循一个简单的循环:
- 推理 (Reasoning):代理思考下一步需要做什么。
- 行动 (Acting):代理采取行动(例如搜索信息)。
- 观察 (Observing):代理检查其行动的结果。
这个循环会重复,直到代理收集到足够的信息来回答用户的提问。
为什么选择 LangGraph?
LangGraph 是构建在 LangChain 之上的一个框架,它允许您将代理工作流定义为图。在这里,图(Graph)是一种数据结构,由节点(流程中的步骤)和连接这些步骤的边(Paths)组成。图中的每个节点代表代理流程中的一个步骤,边定义了信息如何在步骤之间流动。这种结构支持复杂的流程,例如循环和条件分支。例如,您的代理可以在推理和行动节点之间循环,直到收集到足够的信息。这使得复杂的代理行为易于理解和维护。
教程结构
我们将构建两个版本的 ReAct 代理:
- 第一部分:一个简单的硬编码代理,用于理解其工作原理。
- 第二部分:一个由 LLM 驱动的代理,能够做出动态决策。
第一部分:使用简单示例理解 ReAct
首先,我们将创建一个基本的 ReAct 代理,其中包含硬编码的逻辑。这有助于您理解 ReAct 循环的工作方式,而无需涉及 LLM 集成的复杂性。
设置状态 (State)
每个 LangGraph 代理都需要一个 状态 (state) 对象,该对象在图节点之间流动。这个状态充当共享内存,用于积累信息。节点读取当前状态,在其贡献信息后将其传递下去。
|
1
2
3
4
5
6
7
8
9
|
from langgraph.graph import StateGraph, END
from typing import TypedDict, Annotated
import operator
# Define the state that flows through our graph
class AgentState(TypedDict):
messages: Annotated[list, operator.add]
next_action: str
iterations: int
|
关键组件:
StateGraph:LangGraph 中用于定义代理工作流的主类。AgentState:一个TypedDict,定义了代理跟踪哪些信息。messages:使用operator.add来累积所有的思考、行动和观察结果。next_action:告诉图应该执行哪个节点。iterations:计算我们完成了多少次推理循环。
创建一个模拟工具
在真实的 ReAct 代理中,工具是执行世界中操作的函数——比如搜索网络、查询数据库或调用 API。对于此示例,我们将使用一个简单的模拟搜索工具。
|
1
2
3
4
5
6
7
8
|
# Simple mock search tool
def search_tool(query: str) -> str:
# Simulate a search - in real usage, this would call an API
responses = {
"weather tokyo": "Tokyo weather: 18°C, partly cloudy",
"population japan": "Japan population: approximately 125 million",
}
return responses.get(query.lower(), f"No results found for: {query}")
|
此函数模拟了一个具有硬编码响应的搜索引擎。在生产环境中,这将调用一个真实的搜索 API,如 Google、Bing 或自定义知识库。
推理节点 —— ReAct 的“大脑”
这是代理思考下一步该做什么的地方。在这个简单版本中,我们使用的是硬编码的逻辑,但在第二部分中,您将看到这如何变得动态化,并与 LLM 集成。
|
1
2
3
4
5
6
7
8
9
10
11
12
13
14
15
|
# Reasoning node - decides what to do
def reasoning_node(state: AgentState):
messages = state["messages"]
iterations = state.get("iterations", 0)
# Simple logic: first search weather, then population, then finish
if iterations == 0:
return {"messages": ["Thought: I need to check Tokyo weather"],
"next_action": "action", "iterations": iterations + 1}
elif iterations == 1:
return {"messages": ["Thought: Now I need Japan's population"],
"next_action": "action", "iterations": iterations + 1}
else:
return {"messages": ["Thought: I have enough info to answer"],
"next_action": "end", "iterations": iterations + 1}
|
工作原理:
推理节点检查当前状态并决定:
- 是应该收集更多信息吗?(返回
"action") - 我们是否已准备好回答?(返回
"end")
请注意,每个返回值都会更新状态:
- 添加一条“Thought”消息,解释决策。
- 设置
next_action以路由到下一个节点。 - 递增迭代计数器。
这模仿了人类处理研究任务的方式:“我首先需要天气信息,然后是人口数据,然后我才能回答。”
行动节点 —— 执行行动
一旦推理节点决定采取行动,此节点就会执行所选的行动并观察结果。
|
1
2
3
4
5
6
7
8
9
10
11
12
13
14
15
|
# Action node - executes the tool
def action_node(state: AgentState):
iterations = state["iterations"]
# Choose query based on iteration
query = "weather tokyo" if iterations == 1 else "population japan"
result = search_tool(query)
return {"messages": [f"Action: Searched for '{query}'",
f"Observation: {result}"],
"next_action": "reasoning"}
# Router - decides next step
def route(state: AgentState):
return state["next_action"]
|
ReAct 循环执行过程:
- 行动 (Action):调用
search_tool并传入一个查询。 - 观察 (Observation):记录工具返回的结果。
- 路由 (Routing):设置
next_action回到“reasoning”以继续循环。
route 函数是一个简单的辅助函数,它读取 next_action 的值并告诉 LangGraph 下一步去哪里。
构建和执行图
现在我们将所有组件组装成一个 LangGraph 工作流。这就是魔力发生的地方!
|
1
2
3
4
5
6
7
8
9
10
11
12
13
14
15
16
17
18
19
20
21
22
23
24
|
# Build the graph
workflow = StateGraph(AgentState)
workflow.add_node("reasoning", reasoning_node)
workflow.add_node("action", action_node)
# Define edges
workflow.set_entry_point("reasoning")
workflow.add_conditional_edges("reasoning", route, {
"action": "action",
"end": END
})
workflow.add_edge("action", "reasoning")
# Compile and run
app = workflow.compile()
# Execute
result = app.invoke({"messages": ["User: Tell me about Tokyo and Japan"],
"iterations": 0, "next_action": ""})
# Print the conversation flow
print("\n=== ReAct Loop Output ===")
for msg in result["messages"]:
print(msg)
|
理解图结构:
- 添加节点:我们将推理和行动函数注册为节点。
- 设置入口点:图总是从推理节点开始。
- 添加条件边:根据推理节点的决定:
- 如果
next_action == "action"→ 转到行动节点。 - 如果
next_action == "end"→ 停止执行。
- 如果
- 添加固定边:行动完成后,始终返回推理节点。
app.invoke() 调用启动了整个过程。
输出:
|
1
2
3
4
5
6
7
8
9
10
11
12
|
=== ReAct Loop Output ===
User: Tell me about Tokyo and Japan
Thought: I need to check Tokyo weather
Action: search('weather tokyo')
Observation: Tokyo weather: 18°C, partly cloudy
Thought: Now I need Japan's population
Action: search('population japan')
Observation: Japan population: approximately 125 million
Thought: I have enough info to answer
|
现在让我们看看由 LLM 驱动的推理如何使这种模式真正动态化。
第二部分:LLM 驱动的 ReAct 代理
既然您已经理解了工作原理,让我们构建一个真正的 ReAct 代理,它使用 LLM 来做出智能决策。
为什么要使用 LLM?
硬编码的版本虽然有效,但缺乏灵活性——它只能处理我们编程的确切场景。由 LLM 驱动的代理可以:
- 理解不同类型的查询。
- 动态决定要收集哪些信息。
- 根据所学内容调整其推理过程。
关键区别
我们不会使用硬编码的 if/else 逻辑,而是提示 LLM 来决定下一步该做什么。LLM 成为了我们代理的“推理引擎”。
设置 LLM 环境
我们将使用 OpenAI 的 GPT-4o 作为我们的推理引擎,但您可以使用任何 LLM(Anthropic、开源模型等)。
|
1
2
3
4
5
6
7
8
9
10
11
12
|
from langgraph.graph import StateGraph, END
from typing import TypedDict, Annotated
import operator
import os
from openai import OpenAI
client = OpenAI(api_key=os.environ.get("OPENAI_API_KEY"))
class AgentStateLLM(TypedDict):
messages: Annotated[list, operator.add]
next_action: str
iteration_count: int
|
新的状态定义:
AgentStateLLM 与 AgentState 相似,但我们对其进行了重命名以区分这两个示例。结构是相同的——我们仍然跟踪消息、操作和迭代次数。
LLM 工具 — 收集信息
与模拟搜索不同,我们将让 LLM 使用自己的知识直接回答查询。这展示了如何将 LLM 转化为工具!
|
1
2
3
4
5
6
7
8
|
def llm_tool(query: str) -> str:
"""Let the LLM answer the query directly using its knowledge"""
response = client.chat.completions.create(
model="gpt-4o",
max_tokens=150,
messages
|
评论区